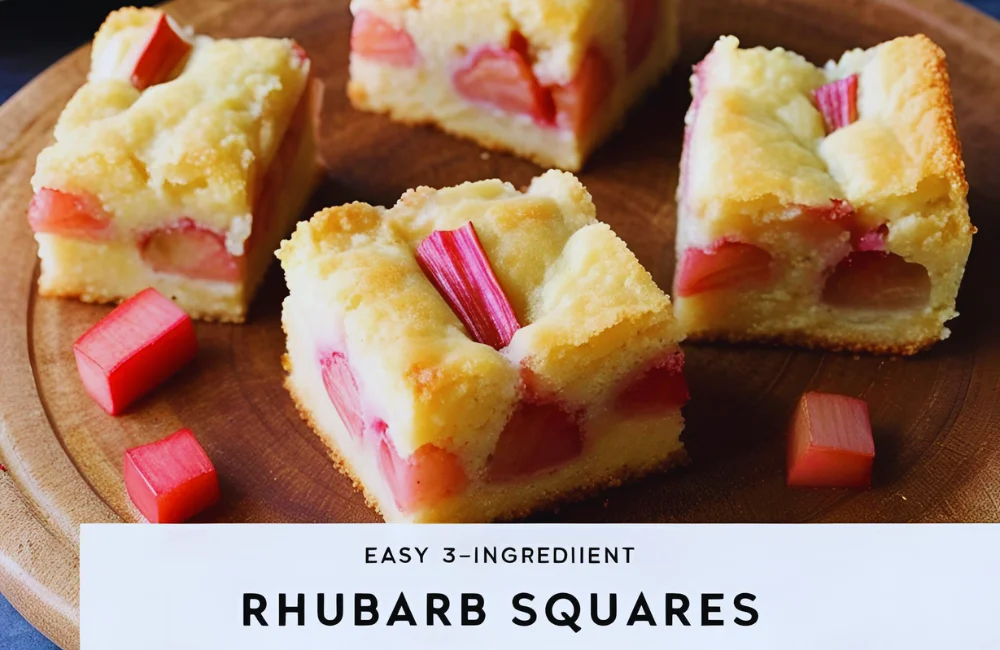
Every spring, the first thing I look forward to in my kitchen is rhubarb season. There’s just something about its tart bite and bold color that gets me excited to bake.
These 3 Ingredient Rhubarb Squares are one of those recipes that saved me on a lazy afternoon when I wanted something homemade, sweet, and easy—without needing a bunch of ingredients or fancy tools.
This recipe was born out of necessity. I had rhubarb from the garden, a can of condensed milk in the pantry, and some self-raising flour.
I crossed my fingers and baked it—and to my surprise, it turned out so good that I had to write it down.
It’s now a go-to recipe whenever I want a quick fruit-cake-style treat that doesn’t leave behind a sink full of dishes.
If you’re looking for a quick way to use up fresh rhubarb, these easy rhubarb squares hit the spot.
With just 3 ingredients and no fancy steps, you’ll have a sweet-tart treat ready in no time. Great for potlucks, picnics, or an afternoon snack with coffee.
How To Make 3 Ingredient Rhubarb Squares?
Recipe Overview
A simple, quick, and satisfying recipe for rhubarb squares made with just 3 ingredients. This is one of my favorite rhubarb bar recipes for busy days or when guests drop in.
- Prep Time: 10 minutes
- Cook Time: 40 minutes
- Total Time: 50 minutes
- Cuisine: American
- Course: Dessert or Snack
- Difficulty: Easy
- Yield: 12 squares
- Calories: ~190 per serving
Equipment You’ll Need
- Mixing bowl
- Wooden spoon or silicone spatula
- 8×8-inch baking dish
- Parchment paper (optional, for easier cleanup)
- Knife for dicing rhubarb
- Measuring cups
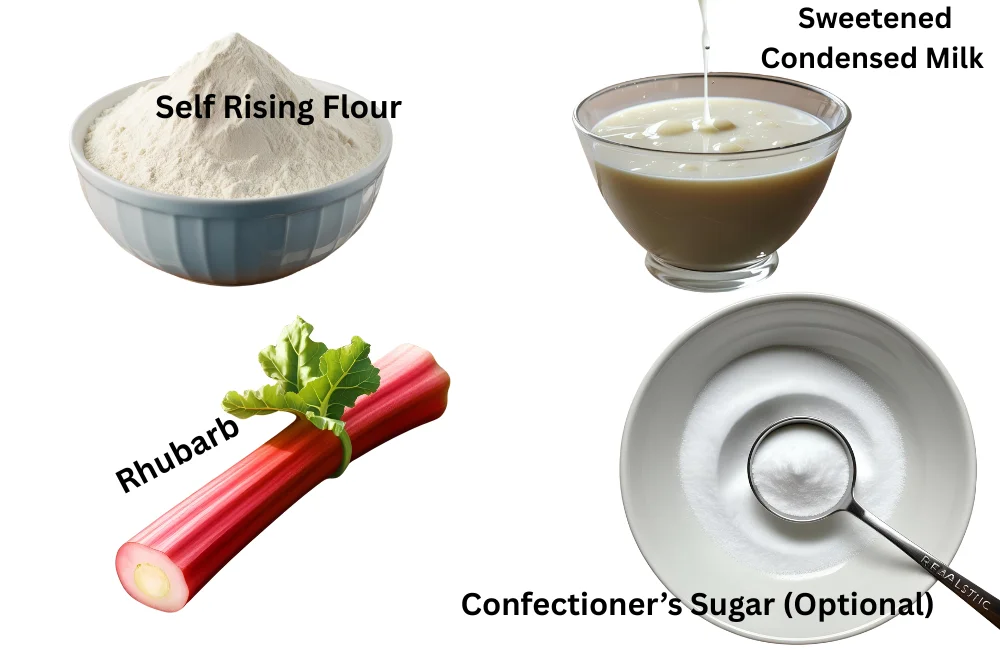
Ingredients
- 14 oz canned sweetened condensed milk
- 1 1/4 cups self-raising flour
- 2 cups diced rhubarb (fresh or frozen)
- 1 tablespoon confectioner’s sugar (optional, for dusting)
Ingredient Notes
1. Rhubarb:
Fresh rhubarb works great, but if using frozen, don’t thaw it—just toss it straight in to avoid excess moisture.
2. Self-raising flour:
No need to add extra baking powder or salt. It’s all built in. If you only have all-purpose flour, mix it with 1 1/2 teaspoons of baking powder and a pinch of salt.
3. Sweetened condensed milk:
This thick, sticky milk gives the bars a creamy texture and adds to their sweetness. No extra sugar is needed.
4. Optional topping:
A dusting of confectioner’s sugar adds a pretty touch once the bars are cool.
Instructions
1. Preheat your oven to 350°F (175°C). Line your baking dish with parchment paper or grease it lightly.
2. Mix condensed milk and flour in a bowl until smooth. It will be a thick, sticky batter.
3. Fold in the diced rhubarb. Don’t overmix—just stir until it’s evenly distributed.
4. Spread the mixture into the baking dish. Use a spatula to smooth out the top.
5. Bake for 35 to 40 minutes, or until the top is golden and a toothpick comes out mostly clean.
6. Let it cool completely before slicing. Dust with confectioner’s sugar if you like.
Nutrition Facts (Per Square)
- Calories: 190
- Carbohydrates: 33g
- Sugar: 20g
- Protein: 3g
- Fat: 4g
- Fiber: 1g
- Sodium: 70mg
How To Know When The Cake Is Ready?
Check the edges—if they’re golden and pulling away from the pan, you’re close. A toothpick inserted in the center should come out with a few moist crumbs but not wet batter.
Please don’t wait until it’s bone dry, or it’ll be overcooked and tough.
1. Golden Edges & Slightly Firm Top:
The edges should be lightly golden and start pulling away from the sides of the baking dish. The top will look set and not jiggly.
2. Toothpick Test:
Gently insert a toothpick into the center of the squares. If it comes out with a few moist crumbs (but not raw batter), you’re good to go. Don’t wait for it to come out bone-dry — these bars are meant to be moist.
3. Slight Puff, Then Settle:
The squares will puff up slightly in the oven and settle down as they cool. That’s normal and helps the texture set just right.
4. Rhubarb Tenderness:
You should see the diced rhubarb softened and bubbling just a bit around the edges. That’s a good sign that the fruit layer is cooked through.
And a quick tip — don’t overbake! It can dry them out. They’ll continue to firm up as they cool, so pull them out when the center is just set.
Tip: If your rhubarb is extra tart, feel free to sprinkle a tablespoon or two of sugar over it before adding the cake mix.
These squares store well in the fridge for a few days and taste even better the next day!
FAQ
Can I Use Frozen Rhubarb?
Yes, just use it straight from the freezer. Don’t thaw it or it’ll make the batter watery.
What If I Don’t Have Self-Raising Flour?
Use 1 1/4 cups all-purpose flour + 1 1/2 teaspoons baking powder + a pinch of salt.
Do These Need To Be Refrigerated?
Nope! They keep well at room temperature for up to 3 days. If it’s warm where you live, refrigerate them.
Can I Double The Recipe?
Yes! Use a 9×13-inch pan and increase the baking time by about 5–10 minutes.
Are These More Like Cake Or Bars?
Somewhere in between! They have a soft, cake-like texture but are firm enough to pick up like a bar.
Final Thoughts
If you’re looking for a no-fuss treat that brings out the best in rhubarb, these 3 Ingredient Rhubarb Squares hit the mark.
They’re quick, budget-friendly, and full of that tangy-sweet flavor we love from good rhubarb square recipes. Give them a go and let me know how they turned out in the comments—I’d love to hear what twist you added!
3 Ingredient Rhubarb Squares
Ingredients
Equipment
Method
- Preheat your oven to 350°F (175°C). Line your baking dish with parchment paper or grease it lightly.
- Mix condensed milk and flour in a bowl until smooth. It will be a thick, sticky batter.
- Fold in the diced rhubarb. Don’t overmix—just stir until it’s evenly distributed.
- Spread the mixture into the baking dish. Use a spatula to smooth out the top.
- Bake for 35 to 40 minutes, or until the top is golden and a toothpick comes out mostly clean.
- Let it cool completely before slicing. Dust with confectioner’s sugar if you like.