Cauliflower Pizza Crust is a gluten-free alternative to traditional pizza dough made from grated or “riced” cauliflower mixed with egg, cheese, and a few seasonings.
It’s baked until golden and crisp, creating a sturdy base for all your favorite toppings. If you’re cutting down on carbs or just looking for a fun twist on classic pizza night, this crust is a total win.
If you’ve ever wanted pizza night to feel just a bit lighter but still satisfy your cravings — this Cauliflower Pizza Crust is the way to go.
It’s now a regular on my menu when I want something comforting but gluten-free and veggie-loaded.
Why You’ll Love This Cauliflower Pizza Crust Recipe“?
You’ll love it because it’s simple, low-carb, and gluten-free. The texture is crisp on the edges, tender in the middle, and cheesy enough to make you forget you’re eating vegetables.
Plus, you don’t need a fancy food processor or special equipment — just a baking sheet, some cheese, and a big craving for pizza.
How To Make Cauliflower Pizza Crust recipe?
Recipe Overview
This Cauliflower Pizza Crust recipe is easy, cheesy, and perfect for anyone craving pizza without the heavy dough.
- Prep Time: 15 minutes
- Cook Time: 25 minutes
- Total Time: 40 minutes
- Cuisine: American / Italian
- Course: Main Course / Snack
- Difficulty Level: Easy
- Yield: 1 large pizza crust
- Calories: About 220 per serving
- Servings: 4
- Serving Size: 1 slice
Equipment You’ll Need
- Baking sheet or pizza stone
- Parchment paper
- Cheese grater
- Large mixing bowl
- Clean kitchen towel (for squeezing out moisture)
- Spatula
Ingredients
- 1 large head cauliflower, roughly chopped
- 1 large egg
- 2 cups shredded mozzarella, divided
- ½ cup freshly grated Parmesan, divided
- Kosher salt, to taste
- ¼ cup marinara or pizza sauce
- 2 cloves garlic, minced
- 1 cup grape or cherry tomatoes, halved
- Torn fresh basil, for serving
- Balsamic glaze, for drizzling

Ingredient Notes
1. Cauliflower: You can use fresh or frozen cauliflower. If using frozen, thaw completely and squeeze out extra moisture. Too much water makes the crust soggy.
2. Cheese: Mozzarella binds everything together, while Parmesan adds flavor and crispiness.
3. Egg: The egg is your binder — it helps the crust hold its shape.
4. Garlic: Adds great flavor to the crust and sauce.
5. Toppings: Keep them light so the crust doesn’t get soggy. Cherry tomatoes, basil, and balsamic glaze make a perfect combo.
Direction
Step 1: Prepare the Cauliflower
Cut the cauliflower into florets and pulse in a food processor until it looks like rice. You can also grate it by hand using a box grater if you don’t have a processor.
Step 2: Steam and Squeeze
Place the riced cauliflower in a microwave-safe bowl and cook for about 5–6 minutes. Once cooled slightly, wrap it in a clean kitchen towel and squeeze out as much water as you can. This step is key — the drier, the better your crust will be.
Step 3: Mix the Dough
In a large bowl, combine the cauliflower, 1 cup mozzarella, ¼ cup Parmesan, egg, minced garlic, and a pinch of salt. Mix until it forms a sticky dough.
Step 4: Shape the Crust
Line a baking sheet with parchment paper and press the dough into a circle or rectangle about ¼ inch thick. Try to keep it even so it bakes properly.
Step 5: Bake Until Golden
Bake in a preheated oven at 400°F (200°C) for 20–25 minutes or until the edges are golden and the center is firm.
Step 6: Add Toppings
Spread the marinara sauce over the crust, sprinkle with remaining mozzarella and Parmesan, add cherry tomatoes, and bake for another 5–7 minutes until bubbly.
Step 7: Garnish and Serve
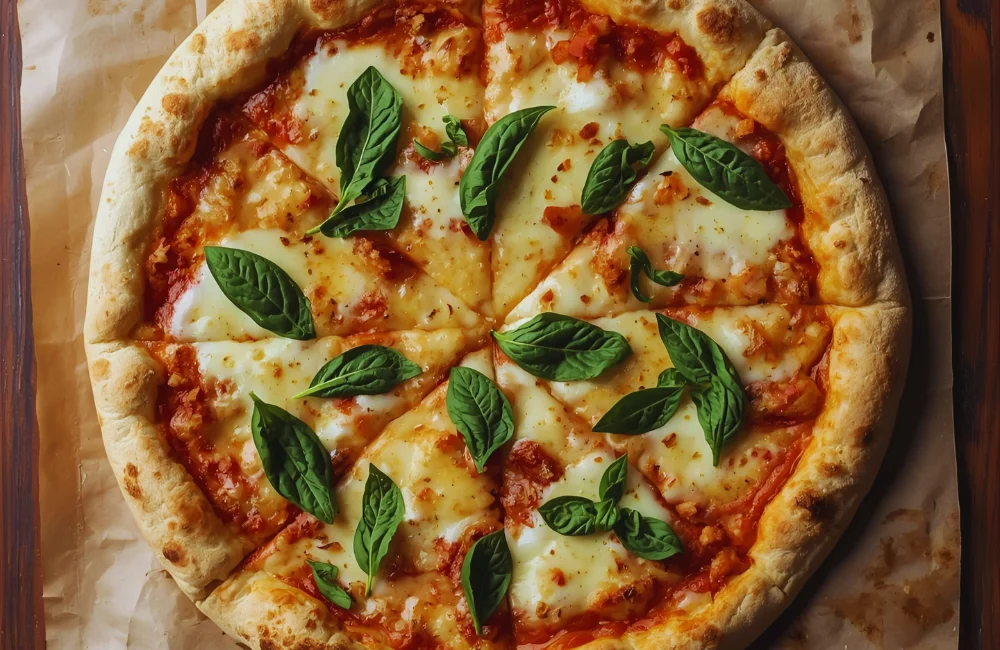
Top with fresh basil leaves and drizzle with balsamic glaze before slicing. Enjoy hot and fresh!
Nutrition Facts (per serving)
- Calories: 220
- Protein: 13g
- Carbohydrates: 8g
- Fat: 15g
- Fiber: 2g
- Sugar: 3g
- Sodium: 430mg
Pro Tips and Variations
✔️ Add extra flavor: Mix Italian seasoning or crushed red pepper flakes into the crust.
✔️ Make it dairy-free: Use vegan cheese alternatives.
✔️ Shape it your way: Try smaller rounds for personal pizzas.
✔️ Want extra crispy edges? Brush a little olive oil around the edges before baking.
✔️ Make ahead: Bake the crust, cool it completely, and store it in the fridge for up to 3 days or freeze for later.
Serving Suggestions
This pizza cauliflower crust tastes great with a light salad or roasted vegetables. I love pairing it with a simple Caprese salad or even garlic-roasted potatoes. It’s a fun way to keep pizza night balanced.
Storing Tips
❖ Fridge: Keep leftover pizza slices in an airtight container for up to 3 days.
❖ Freezer: Store the baked crust (without toppings) in a freezer bag for up to 2 months. Reheat in the oven to bring back that crispy texture.
Health Benefits
➣ Low-carb alternative: Great for anyone watching their carbs or eating gluten-free.
➣ Rich in fiber and vitamins: Cauliflower is packed with vitamin C, vitamin K, and antioxidants.
➣ Protein-packed: The egg and cheese add a nice protein boost.
Recipe Notes
- Always squeeze the cauliflower well — this makes or breaks your crust.
- Don’t overload with sauce or toppings; it’ll soften the crust.
- Use parchment paper for easy removal and cleanup.
- Preheat your oven fully before baking for that golden finish.
FAQs About Cauliflower Pizza Crust
How To Make Cauliflower Pizza Crust Crispy?
Bake it on parchment until golden, then add toppings and bake again. Removing extra moisture from the cauliflower is key.
Is Cauliflower Pizza Crust Gluten-Free?
Yes, this Cauliflower Pizza Crust recipe is naturally gluten-free, perfect for those avoiding wheat.
How Many Calories Are In Cauliflower Pizza Crust?
Each serving of this cauliflower crust pizza has about 220 calories, depending on toppings.
Can I Use Frozen Cauliflower For Pizza Crust?
Yes, just thaw and squeeze it dry before mixing. Frozen cauliflower works just as well for this cauliflower crust recipe.
What Toppings Go Best With Cauliflower Pizza Crust?
Keep it light — fresh tomatoes, basil, mozzarella, and a drizzle of balsamic glaze are my go-to favorites.
Final Thoughts
Homemade Cauliflower Pizza Crust proves you don’t need traditional dough to enjoy great pizza. It’s light, tasty, and full of flavor. Once you make it,
you’ll see how easy it is to turn a simple head of cauliflower into something special. If you try it, tag me or leave a comment — I’d love to know what toppings you used and how yours turned out! 🍕💚
Cauliflower Pizza Crust
Ingredients
Equipment
Method
- Cut the cauliflower into florets and pulse in a food processor until it looks like rice. You can also grate it by hand using a box grater if you don’t have a processor.
- Place the riced cauliflower in a microwave-safe bowl and cook for about 5–6 minutes. Once cooled slightly, wrap it in a clean kitchen towel and squeeze out as much water as you can. This step is key — the drier, the better your crust will be.
- In a large bowl, combine the cauliflower, 1 cup mozzarella, ¼ cup Parmesan, egg, minced garlic, and a pinch of salt. Mix until it forms a sticky dough.
- Line a baking sheet with parchment paper and press the dough into a circle or rectangle about ¼ inch thick. Try to keep it even so it bakes properly.
- Bake in a preheated oven at 400°F (200°C) for 20–25 minutes or until the edges are golden and the center is firm.
- Spread the marinara sauce over the crust, sprinkle with remaining mozzarella and Parmesan, add cherry tomatoes, and bake for another 5–7 minutes until bubbly.
- Top with fresh basil leaves and drizzle with balsamic glaze before slicing. Enjoy hot and fresh!
Notes
 Always squeeze the cauliflower well — this makes or breaks your crust.
Don’t overload with sauce or toppings; it’ll soften the crust.
Use parchment paper for easy removal and cleanup.
Preheat your oven fully before baking for that golden finish.
Always squeeze the cauliflower well — this makes or breaks your crust.
Don’t overload with sauce or toppings; it’ll soften the crust.
Use parchment paper for easy removal and cleanup.
Preheat your oven fully before baking for that golden finish.